By using our website, you agree to the use of cookies as described in our Cookie Policy
【Fleur Wedding Tips】Wax Seal Tutorial: Tips for Creating Elegant Wedding Details
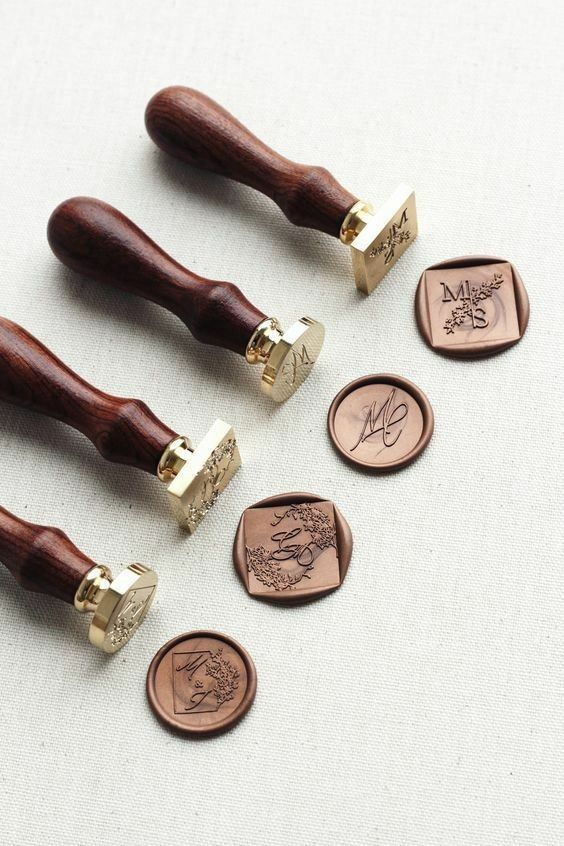
Wax seals have made a charming comeback in modern weddings — from invitations to escort cards, and even personalized thank-you tags, a well-executed wax seal adds a romantic and vintage-inspired touch to any detail. Whether you're planning to DIY or simply want to understand the process before communicating with your stationer, this guide walks you through everything you need to know.
What You’ll Need
Prepare all your tools before you start:
- Wax beads
- Wax melting spoon & burner
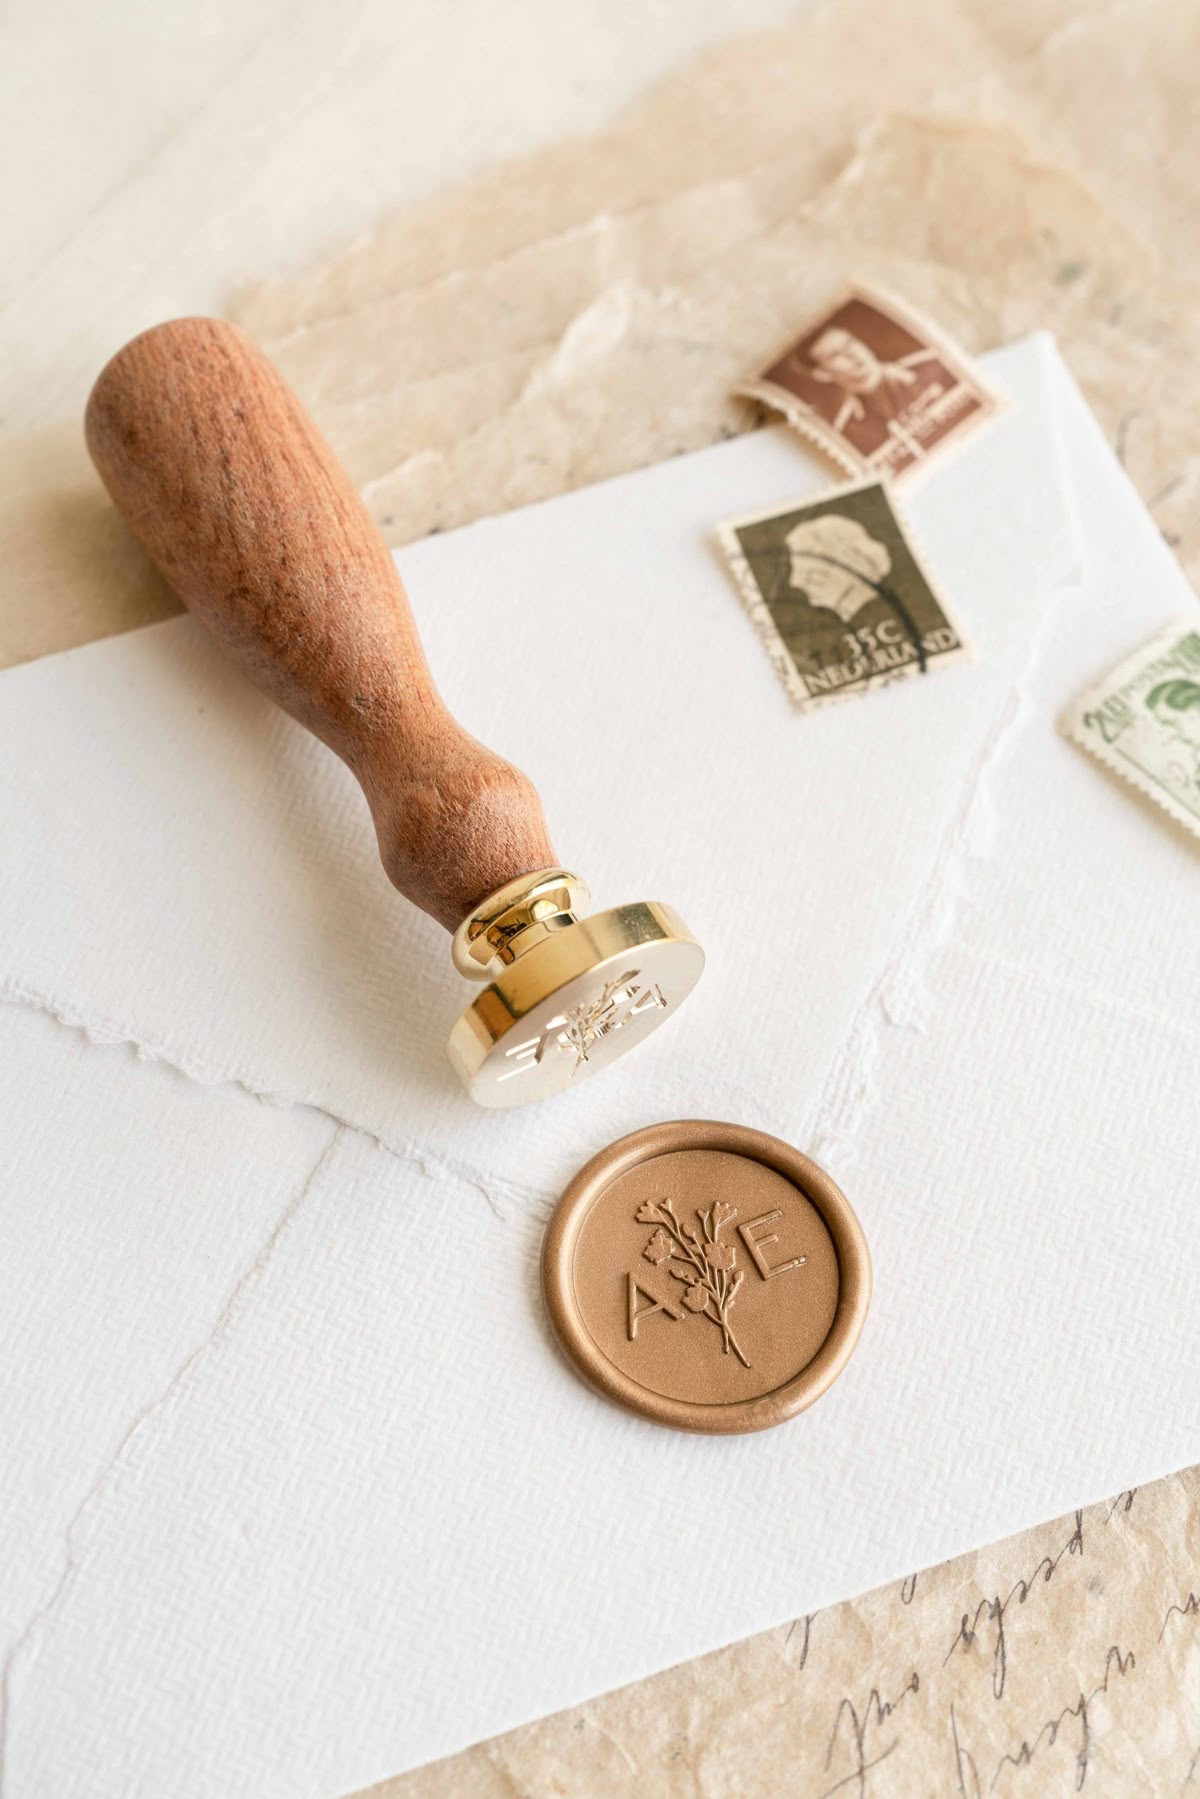
- Wax seal stamp
- Envelopes or paper cards
- Aluminum foil
- Lighter
- Toothpick
- Kitchen paper towels
- A bowl of ice water (highly recommended!)
Note: Use wide and short candles to avoid the flame extinguishing easily due to lack of oxygen.
Step-by-Step Instructions
Step 1: Add Wax Beads to the Spoon
If you’re using wax sticks, cut them into small beads or consider using a glue gun for easier control.
Recommended amount:
- 3cm seal → 5 beads for first use, 4 beads afterwards
- 2.5cm seal → 4 beads for first use, 3 beads afterwards
Step 2: Melt the Wax
Light your candle and place the spoon above the flame. Stir gently with a toothpick to help the wax melt evenly and avoid overheating.
⚠ Too many bubbles during melting = too hot! Lift the spoon a bit and stir to reduce heat.
Step 3: Pour the Wax
Once fully melted, carefully pour the wax onto your envelope or card. Try to form a round pool. Press the stamp directly into the wax.
Wait at least 30 seconds or until fully cooled before removing the stamp for the cleanest result.
Step 4: Let It Cool Completely
Don’t rush it — if the wax hasn’t set, it’ll stick. Once it’s fully hardened, remove the seal.
Additional Tips for a Perfect Finish
1. Practice on foil
Use aluminum foil as a base to practice. Once the wax cools, peel it off and apply double-sided tape on the back — this gives you the freedom to attach the seals wherever you want!
2. Clean your spoon while it’s hot
Always wipe the spoon with a paper towel while it’s still warm. If switching colors, be sure to clean thoroughly to avoid mixing shades.
3. Cool your stamp between uses
Dip the stamp into ice water after each seal to cool it down — this prevents it from reheating the wax too much when stamping the next one.
4. Don’t be afraid to redo
Order extra wax beads and envelopes so you can retry without stress. Like all good things, it gets better with practice!
At Fleur Weddings, we believe a beautiful wax seal isn’t just about aesthetics — it’s about the emotion it conveys. A delicate emblem pressed into molten wax tells a story of intention, detail, and love.
While we don’t handle production directly, our planners are always happy to recommend quality vendors, guide the aesthetic choices, and ensure your paper goods align perfectly with your wedding vision. A well-matched wax color or monogrammed seal can echo the romance of your floral palette, your invitation suite, or even your shared initials.
Let us help you bring these little moments of joy to life, seamlessly and beautifully.
‹ Back